Choose a sound board by matching your space, sources, and budget. List every input, add headroom, and decide between analog warmth and simple workflow or digital flexibility with built-in effects and USB. Prioritize clean preamps, high signal-to-noise ratio, intuitive layout, and proven brands like Yamaha, Behringer, or Allen & Heath. Plan I/O, expansion, and accessories (cables, DI boxes), plus room acoustics. Balance must-haves vs. nice-to-haves and confirm warranty. Next, you’ll see how it all comes together.
Key Takeaways
- Define your use case (live events or studio) and list all sources to calculate required channels with headroom for growth.
- Choose analog for tactile simplicity and warmth; pick digital for built-in effects, automation, and extensive connectivity.
- Prioritize clean preamps and high signal-to-noise ratios for clearer mixes and better overall sound quality.
- Ensure essential I/O (XLR, TRS, USB), intuitive layout, and confirmed expandability, warranty, and durability.
- Budget for must-have features first, then allocate funds for cables, DI boxes, and basic acoustic treatment.
Understanding Audio Sound Boards
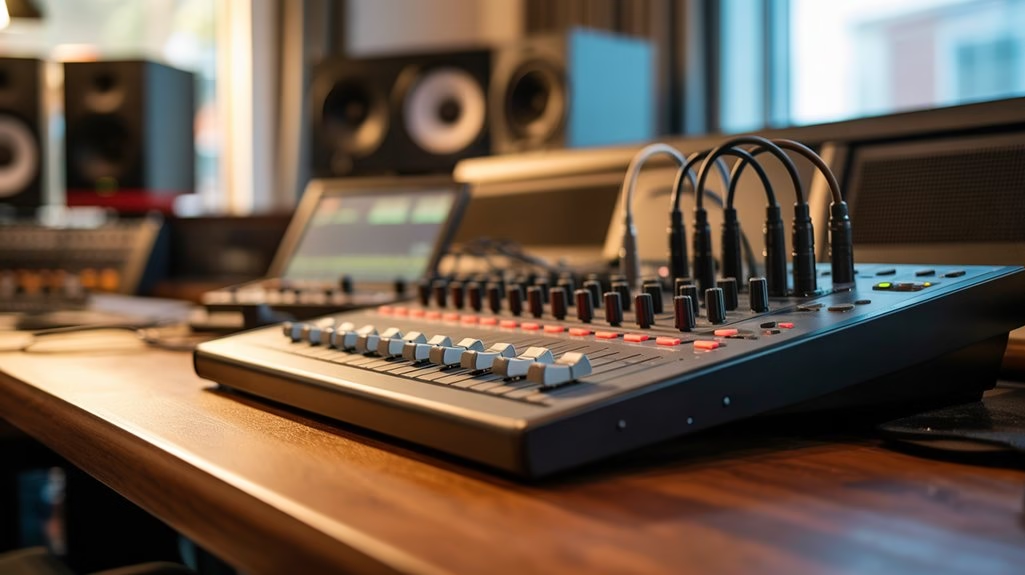
At its core, a sound board is the command center that routes and shapes audio from microphones, instruments, and playback devices.
When you understand audio sound boards, you see how channels/strips handle individual input sources, while faders, knobs, and EQ sculpt balance and tone.
Analog mixers give you tactile control and a warm character; digital consoles add advanced features like scene recall and built-in effects.
You’ll judge performance by signal-to-noise ratio and preamp quality, since clean gain and low noise protect your mix.
Match layout and workflow to your intended use, noting how many inputs and auxiliary paths you’ll actually manage.
Research reputable models, compare metering and routing options, and confirm latency, headroom, and reliability align with the work you’ll do.
Determining Your Needs
Knowing how a mixer works is only helpful if you match it to what you actually do. Start by determining your needs: are you running live events or working in a recording studio?
List your audio sources—microphones, instruments, playback devices—and calculate the number of channels you truly require, with a little headroom.
Pinpoint essential features that fit your workflow, like onboard effects for shows or computer connectivity for multitrack capture.
Set a realistic budget that balances must-haves with nice-to-haves; more capability in sound equipment usually raises cost.
Measure your physical space to decide whether a compact footprint is necessary. If space is tight, digital mixers often pack more into smaller frames.
Prioritize clarity, expandability, and reliability over extras you won’t use.
Analog vs. Digital Sound Boards
So which path fits your workflow: analog’s hands-on simplicity or digital’s feature-packed flexibility?
If you crave tactile faders and fast, intuitive operation, analog sound boards deliver. They’re easy to set up, great for live sound, and often praised for warm, vintage audio quality. They’re also lower in cost, though you’ll likely add external effects processing.
Digital sound boards trade knobs for deep control. You’ll get scene presets, recallable mixes, and extensive connectivity—ideal in a recording studio or hybrid setups. Built-in effects processing, routing, and automation expand creative options, but the interface can demand a learning curve.
Let your intended use lead: choose analog for straightforward, reliable gigs; go digital for versatility, DAW integration, and long-term adaptability.
Either way, prioritize audio quality and workflow.
Researching Brands and Models
With your analog-or-digital direction set, start narrowing choices by researching brands and models with strong track records.
Focus on reputable manufacturers known for quality craftsmanship—Yamaha, Behringer, and Allen & Heath are reliable starting points.
Compare each sound board using professional reviews and user feedback to gauge performance, reliability, and workflow.
Examine the signal-to-noise ratio; higher values mean cleaner mixes and less hiss.
Assess interface design: clear labeling, sensible grouping, and responsive controls reduce mistakes and speed up sessions.
Test menus and screens on digital units for logical navigation.
Confirm expandability options and compatibility with your existing ecosystem, including software integration and accessory support.
Finally, scrutinize warranty coverage and service networks; fast, accessible support can save projects and protect your investment over time.
Planning Your I/O: Channels, Connectivity, and Expansion
Although specs can feel abstract, start by mapping every source you’ll plug in and where the signal needs to go. Count microphones, instruments, and playback devices, then add 5–20 extra channels for expansion.
Prioritize connectivity: XLR for mics, TRS for line gear, and USB for recording or streaming. Check auxiliary sends/returns for monitor mixes and optional effects routing. Confirm outputs for mains, subs, recorders, and streaming feeds.
Compare the signal-to-noise ratio—higher SNR preserves sound quality across your audio equipment and longer cable runs. Favor mixers that trade clutter for versatility.
1) Secure headroom: extra channels prevent panic when a guest or instrument appears.
2) Protect clarity: high SNR and clean outputs keep mixes confident and quiet.
3) Enable growth: flexible connectivity allows painless expansion later.
Mixers, Amps, and Effects Processing Essentials
You’ve mapped your I/O; now put the core pieces in place: the mixer, the power, and the effects. Choose mixers that match your channel count—5 to 20 is typical—leaving headroom for growth. Decide between digital convenience (scene recall, deeper routing) and analog tactility with a warmer character.
Prioritize high-quality preamps and a strong signal-to-noise ratio to elevate sound quality across your audio setup.
Size amplifiers to your speakers and venue. Aim for amplifier wattage that comfortably exceeds speaker ratings to prevent clipping, protect drivers, and maintain clarity. Clean power with a favorable SNR matters as much as raw output.
Integrate effects processing thoughtfully. Use reverb, delay, and zone control to shape space and keep multiple speaker areas cohesive.
Select dependable audio equipment that streamlines workflow without sacrificing fidelity.
Microphones, Cabling, and Power Requirements
Before you mic anything, match the tool to the job: dynamic mics excel on stage for their toughness and high-SPL handling, while condensers shine in the studio for sensitivity and extended frequency response.
Choose microphones with your workflow in mind, then plan cabling to keep signals clean. Use quality XLR cables and balanced cables end-to-end to fight interference. Keep runs as short as practical.
Condenser mics need phantom power (+48V). Verify your sound board or audio interface supplies it per channel, and confirm global vs per-input switching.
Mind total power requirements when multiple condensers are engaged.
- Lock in confidence: clean gain, zero hum, and rock-solid connections.
- Capture truth: the right mic and cabling reveal nuance, not noise.
- Power with purpose: deliver reliable phantom power without surprises.
Speaker Selection, Placement, and Room Acoustics
Start by matching speakers to the room, because size and shape dictate what works. For speaker selection, larger rooms often favor floor-standing speakers for fuller coverage and stronger bass response, while small rooms benefit from compact bookshelf speakers that control reflections and maintain sound quality.
Respect room acoustics: use rugs and panels to tame echoes and tighten imaging. For even better control of reflections and low-end buildup, add corner bass traps and seal gaps with acoustic sealant to prevent sound leakage.
Respect your room: rugs and acoustic panels tame echoes and tighten stereo imaging.
Nail placement. Set front speakers at ear height, toe them toward the listening position, and keep distances symmetrical. Place subwoofers near corners to reinforce bass response, then fine-tune by moving them a few inches at a time.
Remember the inverse square law: shorter distances improve clarity and volume without overdriving.
For wide spaces, multiple smaller speakers can enhance sound distribution and create a more even, immersive field.
Budgeting, Value, and Long-Term Support
Although gear lust is real, set a clear budget first and tie it to what you actually need today and in two years. Sound boards span under $100 to $5,000+, with quality generally scaling with price. Anchor your budgeting to must-have channels, I/O, and workflow.
Prioritize long-term value: choose durable builds, proven preamps, high SNR, and expandability for future growth. Reputable brands with solid warranties and responsive customer support protect your investment and uptime.
Budget for accessories—cables, DI boxes, effects processors—because they directly affect functionality and sound quality. Stretch where clarity matters most: clean preamps and low noise floors. Don’t overbuy features you’ll never use; do plan for upgrades.
1) Hear confidence: quieter mixes, richer detail.
2) Feel security: warranties and helpful support.
3) Own growth: expansion without waste.
In New Jersey homes and studios, consider how sound boards integrate with sound transmission control—pairing proper acoustic treatment and sealing gaps around doors and windows helps maintain quieter rooms and boosts overall value.
Frequently Asked Questions
What Is the 3 to 1 Rule Sound Recording?
The 3 to 1 rule in sound recording means you place microphones three times farther from each other than from the sound source.
You use it to control microphone placement, improve sound isolation, and tame room acoustics. It’s one of the core recording techniques for cleaner audio mixing, better frequency response, and preserved dynamic range.
What Is the Best Audio Setup?
The best audio setup matches your use, space, and budget.
Prioritize audio quality with suitable speaker types: floorstanders for big rooms, compact bookshelves for small spaces, plus a sub and center.
Evaluate room acoustics and wireless options.
Plan budget considerations: $300–$2,000 can excel.
Include sound mixing, quality amps, and proper placement.
Do brand comparisons—Arendal and peers.
Follow installation tips: speaker height, toe-in, calibration, and sub placement to tighten bass and imaging.
How Many Watts Is a Good Sound System for Home Theater?
Aim for 50 watts per channel for a home theater in small to medium rooms; think 100+ watts for larger spaces or louder tastes—like cranking a Victrola.
Match wattage requirements to speaker sensitivity; 90 dB speakers need less power. For 5.1, target 500–1000 watts total.
Prioritize audio quality, speaker placement, and room acoustics. Confirm the receiver exceeds speaker ratings.
Balance budget considerations and do brand comparisons to avoid overpaying for negligible gains.
What Is a Good Soundboard for Beginners?
A good soundboard for beginners is the Yamaha MG10XU or Behringer Xenyx Q802USB.
You’ll get beginner soundboards with USB audio interface options, built-in effects, and an essential features checklist: 8+ channels, EQ, and phantom power.
Consider budget friendly choices ($100–$300), portability considerations, and user friendly software.
Explore online resources for setup tutorials.
Other brand recommendations: Mackie Mix Series for analog feel.
You’ll grow fast with dependable gear and intuitive controls.
Conclusion
You’ve walked the signal path, from inputs to applause. Now, choose your board like Odysseus picks his course—eyes on the stars, hands on the helm. Match your I/O to real needs, balance analog warmth with digital brains, and let your room shape the mix. Pair the right mics, cables, amps, and speakers, and budget for tomorrow’s tour. Do that, and when the faders rise, you won’t just hear sound—you’ll hear your space sing.