Creating the Perfect Home Theater: Soundproofing + Smart Automation
Start by choosing a quiet, dedicated room and sealing gaps with acoustic caulk for isolation. Layer mass‑loaded vinyl, insulation, resilient channels, and double 5/8″ drywall with Green Glue, then add bass traps and first‑reflection panels. Map a 7.1/9.1 system with dual subs and Atmos, and run full room correction. Use dimmable cans, sconces, and blackout shades. Tie everything together with smart scenes and voice control for one‑touch “Movie Night.” Professionals guarantee reference results—and there’s more to master.
Key Takeaways
- Choose a dedicated, quiet room; seal gaps with acoustic caulk and add mass-loaded vinyl, resilient channels, and double drywall for maximum isolation.
- Treat acoustics with first-reflection panels, corner bass traps, thick rugs, and heavy drapes to reduce echoes and tighten bass.
- Plan a 7.1/9.1 system with dual subwoofers and Atmos height channels; run full room-correction calibration.
- Implement dimmable recessed lighting, blackout shades, and glare-free ambient strips; integrate into a smart control system.
- Create one-touch and voice-controlled scenes (Movie Night, Game Day) to automate lights, audio, and shades; consider professional design and installation.
Choosing the Ideal Room
Start by picking a dedicated, quiet room you can fully control. When choosing the ideal room, prioritize isolation from external noise and light to protect immersion. A basement often excels thanks to natural insulation and fewer windows, improving overall acoustic performance and visual consistency.
Confirm the room dimensions support comfortable seating, proper sightlines, and flexible layout options. Map speaker locations early; you’ll set distances, angles, and heights to achieve superior sound quality without blocking pathways or screens.
Evaluate soundproofing potential and light control, but focus first on selecting a dedicated room that minimizes interruptions. Consider door placement, HVAC noise, and proximity to household traffic. If uncertain, consult a professional to assess layout constraints and recommend the best space for a refined home theater experience. To boost isolation in your chosen room, plan for resilient channels or MLV in walls and ceilings to reduce vibration transfer and block sound leakage.
Soundproofing Fundamentals
With the room chosen, turn your focus to soundproofing so you can control what you hear—and what escapes. Your goal is a controlled listening environment that blocks outside noise and preserves sound quality.
Start by sealing gaps around doors, outlets, and trim with acoustic caulk to improve sound isolation. Add mass loaded vinyl behind walls or under flooring to block transmission.
When renovating, use soundproof drywall on resilient channels and pack cavities with insulation rated for high STC. These layers cut structural vibrations and reduce leakage.
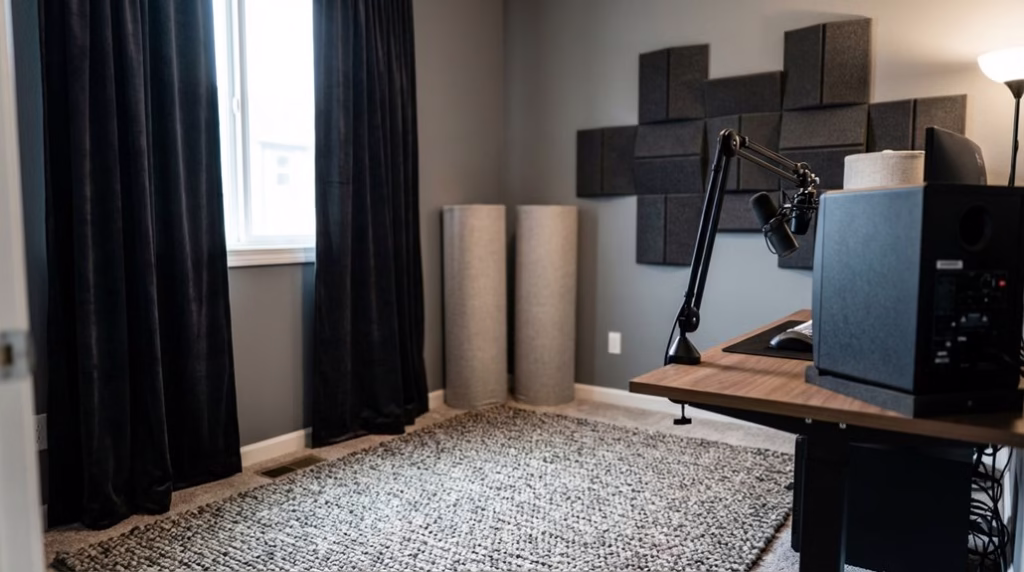
For existing spaces, hang soundproofing curtains and place acoustic panels to tame reflections while you enhance audio clarity. Supplement with acoustic foam panels where flutter echoes persist.
Together, these steps keep sound in, noise out, and your movies immersive. For maximum isolation, combine double drywall with Green Glue and resilient channels to boost STC and convert sound energy into heat.
Acoustic Treatment Strategies
Three targeted treatments transform a lively room into a precise listening space: broadband panels, bass traps, and absorptive finishes.
Mount acoustic panels at first‑reflection points to cut echoes and sharpen dialogue. Place bass traps in corners to tame low‑frequency buildup, restoring tight, balanced bass.
Mount panels at first reflections; add corner bass traps for tighter, clearer, balanced sound.
Layer carpet, thick rugs, and heavy drapes to boost sound absorption and limit leakage, raising overall audio quality without over‑deadening the room.
Add soundproofing curtains to block street noise and dress the space, reinforcing an immersive viewing environment.
Start with a professional acoustic analysis to pinpoint problem modes and reflections, then tune placement and quantity for your custom home theater.
Iterate: listen, measure, adjust panel height or trap density. With smart placement and mixed materials, you’ll achieve clarity, impact, and consistency.
For best results, identify first reflection points using the mirror technique and aim to cover 30–40% of wall and ceiling surfaces to maximize absorption and dialogue intelligibility.
Lighting Design and Control
How do you create cinematic mood without sacrificing picture quality? Start with lighting design that serves the image, not fights it. Use dimmable lighting—primarily recessed cans—to tune brightness for your theater room.
Add wall sconces or LED strips as ambient lighting along aisles or under seats; position them to avoid glare. Pair the setup with blackout curtains or motorized shades so daylight never washes out the screen. For added efficiency, motorized shades can coordinate with lighting control to maintain target light levels, as solar sensor adjustments raise shades while smart fixtures dim to reduce waste.
Use smart automation to create scenes: “Trailers,” “Feature,” and “Intermission.” One tap can lower blackout curtains, fade sconces to 10%, and set aisle LEDs for safe movement.
Program motion triggers for gentle path lights after credits. Control lighting independently from soundproofing systems, but coordinate cable runs and wall penetrations to preserve isolation.
With careful placement and automation, you’ll enhance immersion without distraction.
Screen and Projector Selection
Ready to lock in a cinematic image? Start with screen size: target 100–150 inches, scaled to your room for ideal viewing comfort.
Match screen types to your setup—fixed frame for dedicated rooms, motorized for flexibility, or acoustically transparent if you’ll hide speakers behind the screen.
Next, nail projector selection by evaluating room lighting conditions. In mixed light, 4K projectors with at least 2,500 lumens and 10,000:1 contrast deliver crisp, saturated images.
Ensure proper projector placement: position the lens 1.5–2.5 times the screen width to maintain clarity and avoid keystone distortion.
After installation, perform calibration. Adjust brightness, contrast, color temperature, and gamma to your environment, then fine-tune focus and sharpness.
Revisit calibration periodically to keep images consistent as lamps age and conditions change.
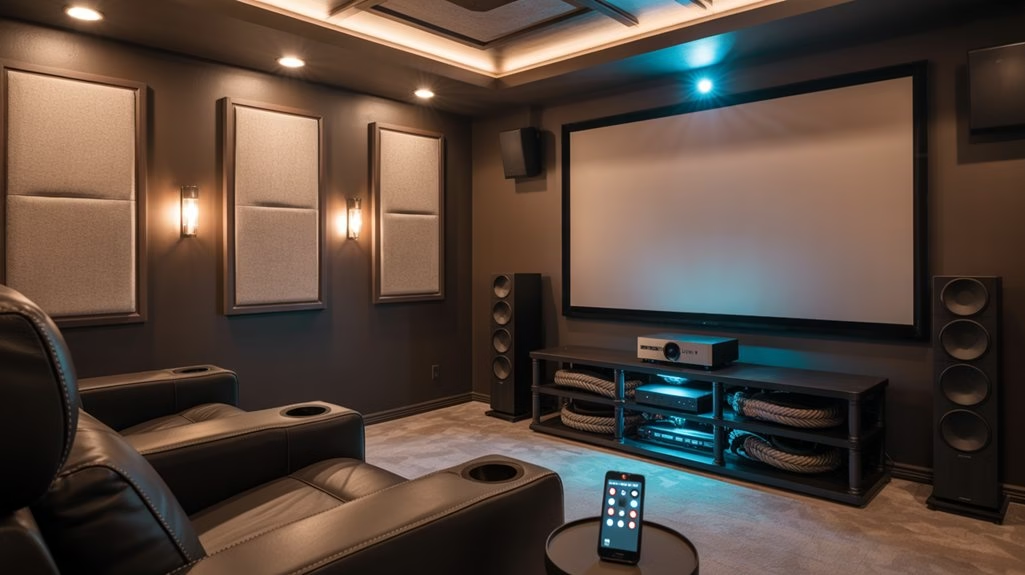
Immersive Audio System Setup
With the image locked in, it’s time to build sound that matches the visuals. Start your home theater system with a 7.1 or 9.1 surround sound system sized to the room for true immersive entertainment.
Prioritize precise speaker placement: front and surround channels at ear level, angled toward the main listening position. Add dual subwoofers if possible; place them symmetrically to smooth bass without boom.
Place fronts and surrounds at ear level, aim at the sweet spot, and use dual, symmetric subs for smooth bass.
In larger rooms, include Atmos height channels for a three-dimensional audio system that lifts effects overhead.
Run full calibration using your receiver’s room correction to balance levels, distance, and crossover points.
Wireless options—smart soundbars with wireless surrounds and subs—reduce cabling and speed setup. Smart automation ties profiles to content, while soundproof drywall helps contain impact and preserves fidelity. Add resilient channels to decouple drywall from studs and significantly reduce structure-borne sound for cleaner low-frequency performance.
Seating Layout and Comfort
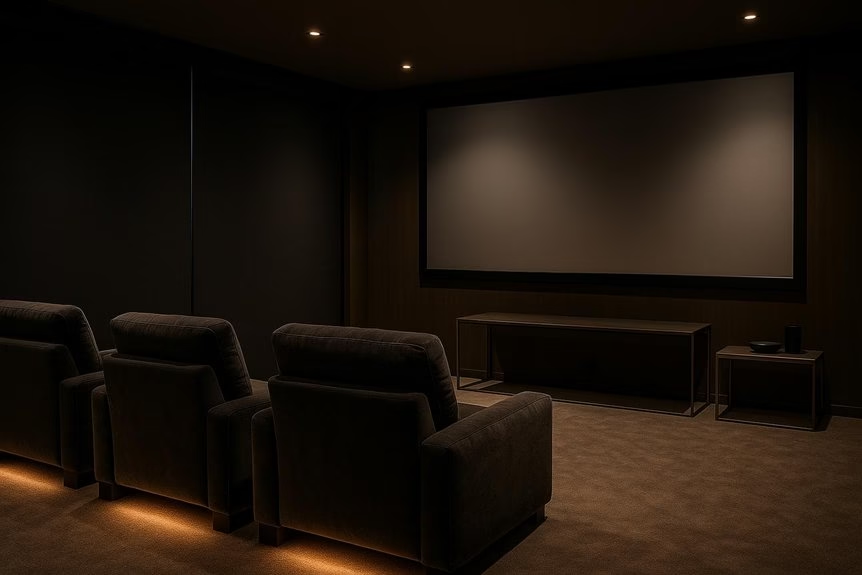
Even before you choose fabrics, plan seating so every spot has a clear view and balanced sound. Start your seating layout by placing the front row about 1.5 to 2 times the screen height away, ensuring a natural viewing experience.
Use tiered seating to lift back rows for unobstructed sightlines and consistent audio immersion. Position surround sound speakers at seated ear level, aligning them with your rows to keep dialogue and effects precise.
Choose reclining seats with adjustable headrests and cup holders to boost comfort during long films. Leave enough aisle and foot clearance so reclines don’t block pathways.
Add acoustic treatment—carpeting, wall panels, and soft furnishings—around seating areas to tame echoes and tighten bass. Calibrate angles so every seat feels centered, not sidelined.
For better isolation, seal any nearby wall or ceiling penetrations with acoustic caulk to prevent sound leakage that can disrupt immersive listening.
Smart Automation Essentials
Although picture and sound set the stage, smart automation makes your theater feel effortless. Start by integrating smart lighting, audio, and video into one automation system so your home entertainment system runs from a single interface.
Touch-screen control lets you navigate sources, adjust volume, and tweak picture modes without juggling remotes.
Program automated scenes to dim lights, lower shades, and set audio levels the moment playback begins, tailoring each session to enhance comfort and create an immersive environment. Centralized dashboards simplify troubleshooting and keep settings consistent across devices.
Choose professional installation for reliable networking, clean wiring, and calibration. You’ll gain scalability, so future components drop into your home automation with minimal disruption.
With streamlined control and thoughtful design, smart automation becomes the backbone of your theater.
One-Touch Scenes and Voice Control
As your system comes to life, one-touch scenes and voice control turn complex routines into a single tap or phrase. You cue “Movie Night,” and automation dims lights, closes curtains, and powers the projector while your AVR selects the right preset.
Prefer hands-free? Use voice control through smart assistants like Alexa, Google Assistant, or Siri to start playback, change inputs, or adjust volume without leaving the couch.
These customizable settings elevate your home theater, adding convenience and an immersive experience tailored to each activity.
- Movie Night: Warm dimming, subwoofer boost, projector on, streaming app launched.
- Game Day: Brighter lighting, motion smoothing off, low-latency mode, balanced dialog.
- Intermission: Path lights up, pauses content, raises curtains slightly, lowers volume.
You can also extend these scenes across your house, letting media follow you between rooms via centralized control and distinct audio zones for different playback.
Professional Installation Vs DIY
Before you pick up a screwdriver or book an installer, weigh what you gain from each path.
With professional installation, your Home theater benefits from ideal placement of audio-visual components, calibrated sound, and clean wiring that protects performance. Pros bring tailored advice on soundproofing and acoustic treatments, shaping a quieter room and a sharper entertainment experience.
DIY installations can save upfront costs, but they often risk miswiring, poor placement, and overlooked acoustics that limit system potential.
Professionals design scalable systems, so adding new gear or automation later is seamless. They also provide support and maintenance you won’t get by winging it.
If you’re confident with cables and measurements, DIY works for basic setups; for reference-grade results, hire the pro and enjoy.
For DIY soundproofing, start by sealing gaps with acoustical caulk and layering materials like mass-loaded vinyl and 5/8-inch type X drywall to reduce leakage and improve room acoustics.
Frequently Asked Questions
What Is the Golden Rule for Home Theater?
Prioritize soundproofing and acoustic treatment—that’s the golden rule.
In Home theater design, you reduce noise and enhance clarity with acoustic panels and proper sound calibration.
Then refine seating arrangement for ear-level listening, match screen size to viewing distance, and optimize projector placement.
Use lighting control with dimmers and blackout solutions to prevent glare.
Choose furniture selection that minimizes reflections and vibrations.
Balance aesthetics and performance so your system consistently delivers immersive, accurate audio-visual impact.
How to Make Home Theatre Smart?
Like flipping a switch on a sunrise, you make your home theatre smart by pairing smart lighting with automated curtains and smart speakers.
Use voice commands and a mobile app for remote control of sound, screen, and lights.
Add streaming devices for seamless content and multi room audio for whole‑home sync.
Create scenes like “Movie Night” to dim lights and close curtains automatically, then fine‑tune everything from your phone without getting up.
How Do I Optimize My Home Theater Audio?
Optimize your home theater audio by matching speaker placement to your room dimensions and seating.
Choose quality audio equipment and surround sound (7.1 or 9.1).
Add acoustic treatment—wall panels and bass traps—for clarity and noise reduction.
Place the subwoofer along a wall or corner.
Use consistent, high‑resolution audio sources.
Perform sound calibration with a meter or room correction, and recheck seasonally.
Isolate vibrations with stands, rugs, and decouplers to tighten bass and imaging.
What Is the Golden Ratio for Home Theater?
The golden ratio is 1:1.618. Think wave meets shore—use it to tune home theater dimensions, seating arrangement, and screen size.
Set viewing distance about 1.5–2.5x the diagonal. Place speakers and acoustic panels to balance sound distribution. Aim for a ceiling roughly 1.618 times the room’s width.
Let lighting control and aesthetic design echo these proportions, so lines, levels, and lows lock in, giving you immersive, natural performance.
Conclusion
You’ve mapped the room, tamed the noise, shaped the sound, and dialed in lighting, screen, and seats. Now tie it together with smart automation: one-touch scenes, voice control, and seamless routines. Imagine pressing “Movie Night” and the lights dim, the projector wakes, and the bass hums—why leave the couch? Whether you DIY or hire a pro, prioritize calibration, cable management, and future-proof gear. With thoughtful choices, you’ll enjoy a theater that thrills every time you press play.