You can improve the sound isolation of an existing wall without tearing it down, but the right solution depends on the type of noise you’re hearing. Airborne noise—such as voices, TVs, or street sound—typically calls for added mass, airtight sealing, and in many cases professional decoupling strategies. Impact-related noise, by contrast, often travels through the structure and may require ceiling isolation clips and hat channel rather than a simple wall upgrade.
At Total Home Interiors, we help homeowners and apartment residents across West Orange, Jersey City, Hoboken, and the greater NYC area identify the true source of noise before recommending a solution. For many wall applications, high-performance methods such as mass-loaded vinyl, 5/8-inch acoustic drywall, and meticulous acoustic sealant at every gap can significantly reduce sound transfer. But effective soundproofing is rarely about foam panels or quick DIY fixes—it’s about using the right construction methods and premium materials for your specific space.
If footsteps or structure-borne noise are part of the problem, there’s usually more involved than treating the wall alone. That’s where expert design and installation make the difference.
Key Takeaways
- Start by identifying the type of noise you’re dealing with. Voices, TVs, and music are airborne sounds, and those are typically the best candidates for professional wall soundproofing solutions.
- It’s important to understand that acoustic foam and moving blankets may reduce echo within a room, but they do very little to block sound traveling through drywall, studs, and shared wall assemblies.
- In many cases, the most effective upgrade without full demolition is adding mass, such as a new layer of 5/8-inch acoustic drywall installed over the existing wall as part of a professionally planned soundproofing system.
- Airtight sealing is critical. Outlets, seams, perimeter edges, and other penetrations can allow a surprising amount of noise to pass through, which is why detailed sealing is essential for real performance.
- For higher levels of sound isolation, added drywall should be combined with proven construction methods such as insulation, resilient channel systems, decoupling, or specialty materials like mass-loaded vinyl—especially in homes, apartments, offices, and other spaces where privacy and quiet matter most.
What Noise Are You Blocking?
Before anything else, identify the kind of noise you need to stop, because the right solution depends entirely on the source. Voices, televisions, music, traffic, and footsteps all behave differently, and effective soundproofing starts with a professional diagnosis, not guesswork. At Total Home Interiors, we evaluate both the noise level and how sound is traveling so we can recommend the right strategy for your space.
The first step is determining whether you’re dealing with airborne noise or impact noise. Airborne noise, such as conversations, TV audio, or street sound, typically requires a full wall or ceiling assembly designed to block sound transfer with added mass, insulation, and decoupling—not isolated patches or DIY fixes. Impact noise, like footsteps from the floor above, usually travels through the building structure, which calls for a different construction-based approach. In many cases, methods like resilient channels and insulated wall cavities are used to reduce sound transfer more effectively than surface-level treatments.
It’s also important to assess the existing wall or ceiling construction and how the room is used. A bedroom next to a media room has very different soundproofing needs than a home office near a hallway or shared condo wall. For homeowners and commercial clients across West Orange, NJ, Jersey City, Hoboken, and NYC, a clear diagnosis is what prevents wasted time, unnecessary expense, and disappointing results.
Why Foam Won’t Soundproof a Wall
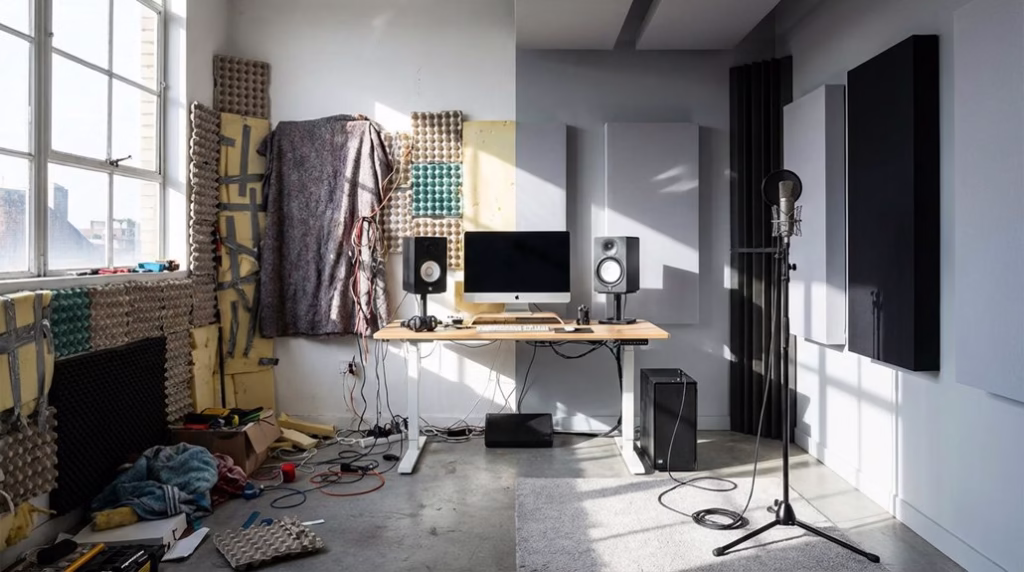
Once you identify airborne noise as the problem, it’s important to correct one of the biggest misconceptions homeowners have: acoustic foam won’t soundproof a wall. Foam and decorative acoustic panels can improve the sound quality inside a room by reducing echo and sharpening speech, but they don’t stop noise from traveling through drywall, studs, and other shared building materials.
This is where many DIY soundproofing mistakes begin. Adding foam to a wall without increasing mass or changing the wall assembly does little to block voices, TV noise, or everyday neighbor sound. The same is true for blankets and soft wall hangings.
In most cases, they offer only minimal reduction because they absorb a small amount of reflected sound rather than prevent transmission. That limitation reflects the reality of foam absorption limits, not true sound isolation.
To meaningfully reduce airborne noise, you need a professionally designed soundproofing system using dense materials and construction methods such as acoustic drywall, mass-loaded vinyl, or decoupled wall assemblies. Methods that improve STC ratings through added mass, damping, decoupling, and airtight sealing are far more effective at reducing sound transfer than foam alone.
For homeowners and apartment residents in West Orange, Hoboken, Jersey City, and across the NYC metro area, that distinction matters. If your goal is a quieter bedroom, better sleep, or more privacy in a home office, professional soundproofing delivers results that surface-level treatments simply can’t match.
Add Mass to Soundproof a Wall
If you want to reduce voices or TV noise coming through an existing wall, the most effective improvement is adding mass and airtight construction, not decorative foam. Real soundproofing requires a heavier wall assembly and careful attention to sealing weak points.
For existing walls, better sound control comes from added mass and airtight sealing, not decorative acoustic foam.
- Add a full new layer of drywall
- Use 5/8-inch drywall when possible
- Cover the entire wall, not just problem spots
- Seal seams, edges, and penetrations carefully
- Don’t confuse acoustic foam with soundproofing
An additional drywall layer can significantly improve airborne sound isolation because greater mass helps resist sound transfer between rooms.
In higher-performance applications, materials such as mass-loaded vinyl and acoustic drywall may be incorporated as part of a professionally designed wall assembly. Using Green Glue between drywall layers can further reduce sound transmission by damping vibration and improving overall isolation.
Electrical boxes, perimeter gaps, seams, and other openings should be sealed to help prevent sound leakage, while nearby doors, windows, and framing paths should also be evaluated since flanking noise can reduce overall results.
The objective is a denser, more continuous barrier that limits sound transmission and delivers a quieter, more private interior.
For homeowners and businesses in West Orange, Hoboken, Jersey City, and the greater NYC area, Total Home Interiors provides professional soundproofing solutions that go beyond basic DIY fixes.
We design wall systems that address real-world noise problems with the right combination of materials, construction methods, and finish quality.
Install MLV Without Leaving Gaps
Installing mass loaded vinyl works best when it’s treated as a continuous soundproofing layer with no gaps, weak seams, or missed perimeter details. Full wall coverage matters because partial sheets can create flanking paths that allow noise to move around the assembly and reduce overall performance.
Each sheet should be laid flat, fitted tightly, and installed according to the manufacturer’s recommended seam overlap so the mass layer stays consistent and secure. Adding acoustic sealant at wall edges and transitions helps maintain the continuous barrier and limits airborne sound leakage.
Every joint should be approached like an air-sealing detail. Seams need to be taped properly with compatible MLV tape, and penetrations around outlets, corners, and wall perimeters should be carefully sealed to prevent hidden leakage paths behind the finished surface.
If the wall assembly includes additional components such as a moisture barrier or acoustic drywall, those layers must be coordinated correctly during installation to avoid punctures, misplaced materials, or compromised results.
For homeowners dealing with neighbor noise, street noise, or poor speech privacy, this is where professional installation makes a measurable difference.
At Total Home Interiors, we design complete soundproofing assemblies for homes and commercial spaces across West Orange, NJ, Jersey City, Hoboken, and NYC—helping clients achieve cleaner, more dependable noise control without the performance gaps that often come with piecemeal or DIY work.
Add 5/8-Inch Drywall for Better Blocking
When the goal is to reduce airborne noise through an existing wall, adding a full second layer of 5/8-inch drywall is one of the most effective ways to improve soundproofing. The added mass makes it harder for sound to pass through, which is why 5/8-inch drywall typically performs better than 1/2-inch drywall in noise-control applications.
For best results:
- Cover the entire wall surface rather than isolated sections
- Confirm stud spacing and wall conditions before installation
- Fasten the new drywall layer evenly and securely
- Seal perimeter edges and gaps with acoustical caulk
- If mass-loaded vinyl was installed behind it, seal MLV seams properly before covering
This should be approached as a complete sound barrier system, not a partial fix.
Even small gaps, loose fastening, or unfinished transitions can reduce performance and allow noise to leak through. Using this added layer as part of a system designed to improve the wall’s STC rating can significantly reduce sound transfer and improve overall acoustic performance.
When professionally installed as part of a larger soundproofing strategy, an added layer of 5/8-inch drywall can make a noticeable difference in privacy, comfort, and day-to-day quiet—especially in condos, apartments, and townhomes throughout West Orange, Hoboken, Jersey City, and the greater NYC area.
Soundproof a Ceiling for Footsteps
Ceiling soundproofing for footsteps requires a different approach than wall soundproofing because the noise is mostly structure-borne. Impact from walking travels through the flooring, joists, and ceiling drywall, not just through the air like voices or TV sound.
That’s why basic insulation or acoustic foam is rarely enough. These materials may help with echo or some airborne sound, but they do little to stop the vibration causing footstep noise.
Basic insulation and acoustic foam may soften airborne noise, but they do little to reduce the vibration behind footstep sound.
Even adding another layer of drywall often delivers only limited improvement if the ceiling is still directly connected to the structure above. For meaningful impact reduction, the ceiling system must be designed to limit how vibration transfers into the finished surface.
Using resilient channels can help decouple the ceiling drywall from the framing and reduce structure-borne sound transmission.
At Total Home Interiors, we approach ceiling soundproofing as a complete system using professional-grade methods and materials such as decoupling techniques, acoustic drywall, and other construction-based solutions selected for the space.
Treating the entire ceiling assembly—not just isolated problem spots—helps reduce flanking paths and delivers more effective, reliable results for homeowners dealing with upstairs noise in apartments, condos, and urban residences throughout West Orange, Hoboken, Jersey City, and the greater NYC area.
Use Isolation Clips and Hat Channel
Isolation clips and hat channel are among the most effective professional solutions for reducing footstep noise through a ceiling because they decouple the drywall from the joists instead of allowing vibration to transfer directly through the structure.
For the best impact-noise performance, the system should be installed across the full ceiling assembly, not just in problem spots. Isolation clips introduce a rubber-separated break in the framing path, and the hat channel supports the new ceiling layer without a rigid connection to the joists. Together, these components help reduce vibration transfer and improve overall soundproofing results. Adding acoustic sealant around gaps and penetrations can further prevent sound leakage and preserve the effectiveness of the decoupled ceiling system.
- Install hat channel perpendicular to the joists per manufacturer specifications
- Fasten drywall only to the hat channel, never directly into framing
- Treat the entire ceiling area for consistent performance
- Seal penetrations carefully and preserve required air gaps
- Avoid screws, brackets, or fixtures that create rigid bridges
Even small installation mistakes can compromise the system by reconnecting the ceiling to the structure. When professionally designed and installed, a clip-and-channel ceiling assembly creates a floating effect that significantly improves sound isolation for homes, apartments, and shared living spaces throughout West Orange, Hoboken, Jersey City, and the greater NYC area.
Frequently Asked Questions
How Much Does Wall Soundproofing Typically Cost?
Wall soundproofing typically costs about $10 to $30 per square foot, depending on the construction method, materials used, and the size of the space.
Basic acoustic treatments may cost less, but true soundproofing solutions—such as mass-loaded vinyl, decoupled wall assemblies, and acoustic drywall—are more effective for reducing neighbor, street, and room-to-room noise and usually involve a higher investment.
Labor often adds another $1 to $5 per square foot, depending on project complexity and local conditions in the Tri-State area.
In many cases, smaller projects start around $500, while more comprehensive installations can exceed $2,000.
For homeowners and businesses in West Orange, NJ, Jersey City, Hoboken, and NYC, professional evaluation is the best way to get an accurate quote and a solution that actually addresses the source of the noise.
Can I Soundproof a Wall in a Rental Apartment?
Yes—noise reduction in a rental apartment is possible, but true soundproofing is limited without construction changes and landlord approval.
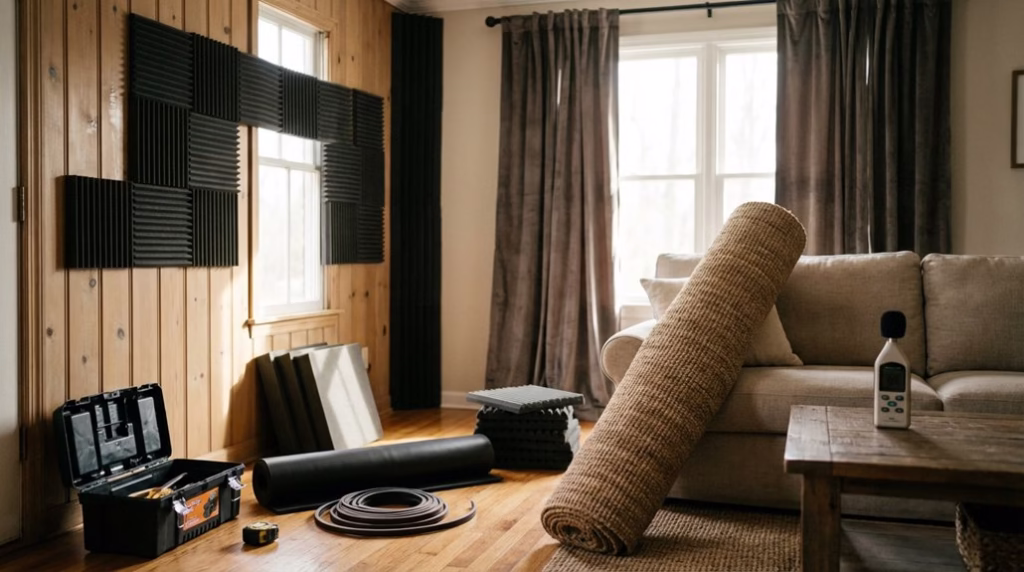
Temporary options like freestanding bookcases, heavy drapery, and removable acoustic treatments can help soften noise and reduce echo, but they typically won’t stop sound transfer through the wall itself.
For meaningful results, professional soundproofing usually involves assemblies such as mass-loaded vinyl, acoustic drywall, or decoupled wall construction—solutions best suited for owners or approved renovations.
If you’re dealing with persistent neighbor or street noise in the Tri-State area, Total Home Interiors can recommend the most effective lease-conscious acoustic and privacy solutions for your space.
How Long Does a Typical Soundproofing Project Take?
A typical soundproofing project can take anywhere from a single day to several days, depending on the scope of work and the construction methods involved.
Simpler improvements, such as acoustic sealant or targeted panel installation, may be completed quickly, while more effective soundproofing solutions like additional drywall, mass-loaded vinyl, or decoupled wall assemblies usually require more time.
Drying and curing time for acoustic caulk, adhesives, and joint compound should also be factored into the schedule.
For homeowners and businesses in West Orange, Jersey City, Hoboken, and the greater NYC area, working with an experienced professional like Total Home Interiors helps ensure the project is completed efficiently, correctly, and with far better long-term results than a DIY approach.
Will Soundproofing Materials Affect Electrical Outlets and Switches?
Yes—soundproofing materials can affect electrical outlets and switches, which is why professional planning matters.
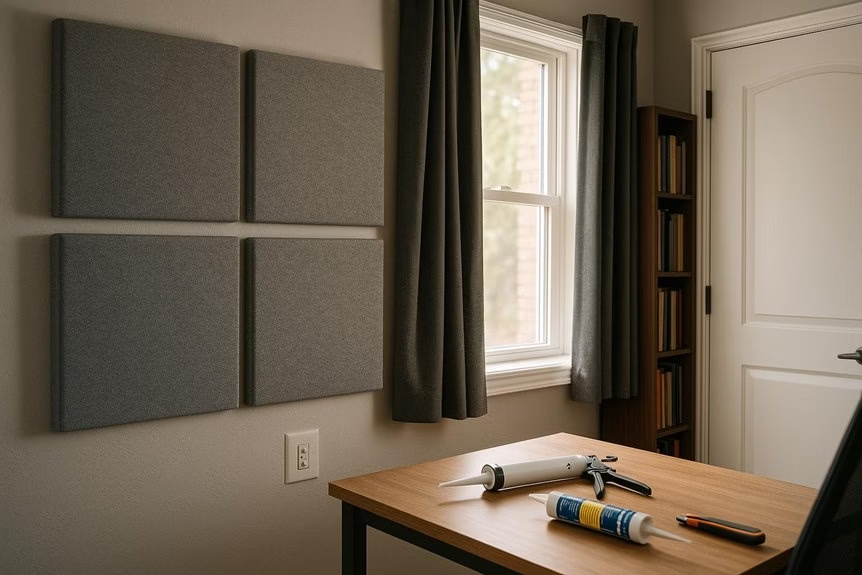
Even small gaps around an outlet can compromise an otherwise well-built wall and allow unwanted noise to pass through.
At Total Home Interiors, we account for these details as part of a complete soundproofing strategy, using proper sealing methods, compatible acoustic materials, and code-conscious installation practices to help preserve both performance and safety.
When treatments involve added wall layers or specialty products like putty pads, outlet depth, cover fit, and electrical box accessibility all need to be evaluated carefully.
Do I Need Professional Help for Effective Wall Soundproofing?
While some minor noise issues can seem DIY-friendly, effective wall soundproofing usually benefits from professional expertise—especially when you want meaningful, lasting results.
In many homes and apartments, true noise control requires more than surface products; it often involves the right combination of mass-loaded vinyl, acoustic drywall, decoupled wall assemblies, and precise installation techniques.
A professional assessment helps identify how sound is actually traveling through your walls so the solution addresses the source, not just the symptoms.
If you’re dealing with neighbor noise, street noise, thin shared walls, or complex construction conditions, working with an experienced soundproofing specialist is the best way to achieve quieter, more comfortable living.
Conclusion
You don’t need to tear a wall down to significantly reduce noise, but lasting results usually require more than quick DIY fixes. The key is identifying how sound is getting through, then using proven soundproofing methods like adding mass, sealing air gaps, and, when needed, upgrading to acoustic drywall or isolation systems. While small improvements can help, the best results come from a professionally designed solution tailored to your space. At Total Home Interiors, we help homeowners and businesses across West Orange, NJ, Hoboken, Jersey City, and the NYC area create quieter, more comfortable environments with custom soundproofing solutions that are built to perform.